A neat and professional way to add list items
Unlike numbered lists, bullet lists let you lay out several points in no particular order. This gives you a good way to list products, summaries, tasks, and other items in a clean format. In Microsoft Word, you can add bullets and customize the options.
We’ll show you how to add bullet points in Word to existing text, start a new list, and change the bullet style to fit your needs.
Table of Contents

Add Bullet Points to Existing Text
If you already have items in your document that you’d like to turn into a bullet list, you can do so in just a few steps.
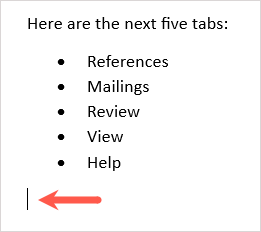
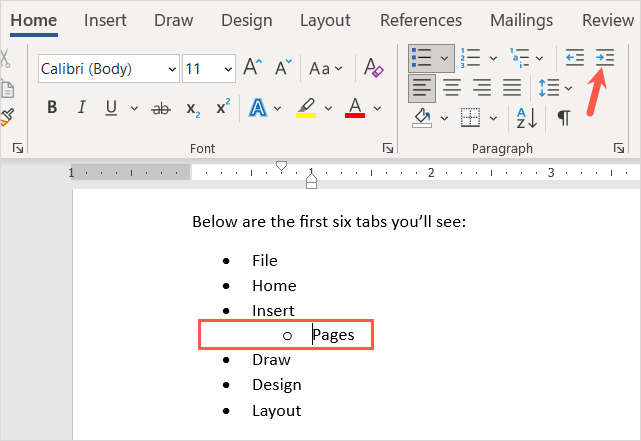
- To get started, make sure each item is on its own line.
- Select all of the items by dragging your cursor through the text.

- Go to the Home tab and select the Bullets button in the Paragraph section of the ribbon. This adds the default black dot bullet.
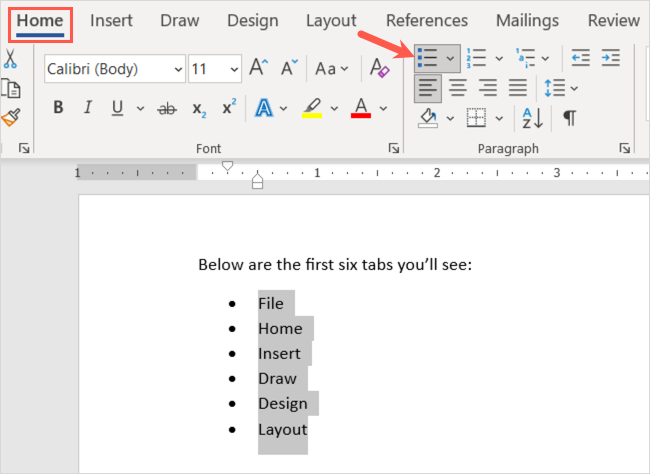
- Alternatively, you can use the down arrow to open the Bullets menu and choose a different style, like a circle or square.

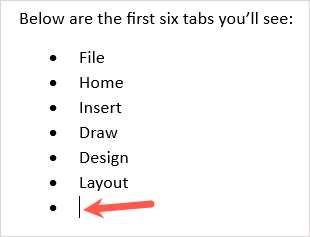
You’ll then have your items listed neatly in a bullet list.
You can continue to add more items as well. Place your cursor at the end of the last item and press Enter or Return. Your cursor will drop down to the next line with a bullet point in place, ready for you to add your next item.
Start a New Bullet List
If you want to start a new list, insert the first bullet point, type your item, and then continue adding more.
- Place your cursor in the document where you want to begin the bullet list.
- Go to the Home tab, select the Bullets button in the Paragraph section of the ribbon, or open the Bullets menu to choose a specific bullet style.
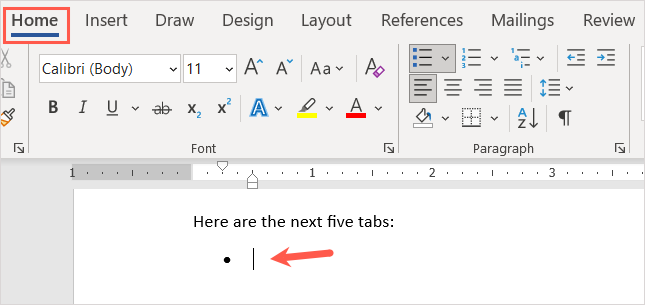
- Type your first item next to the bullet that appears. Press Enter or Return and add your next item.
- Continue this process until you complete your list.
When you arrive at the last bullet point, press Enter or Return two times. This places your cursor on a new line without a bullet point.
Create an Automatic Bullet List
Microsoft Word offers AutoCorrect options that format your text as you type it. One of those options is to create bullet lists automatically.
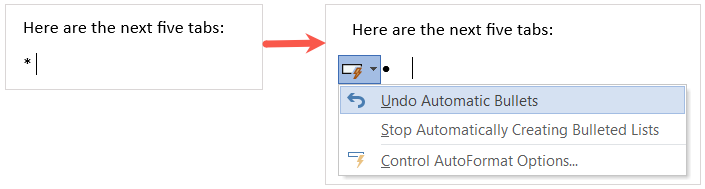
Once you turn on the feature, you can type an asterisk that converts to the default bullet style. You can also type a dash to start a list with dashes as bullet symbols.
- Go to the File tab and select Options.
- Choose Proofing on the left and AutoCorrect Options on the right.
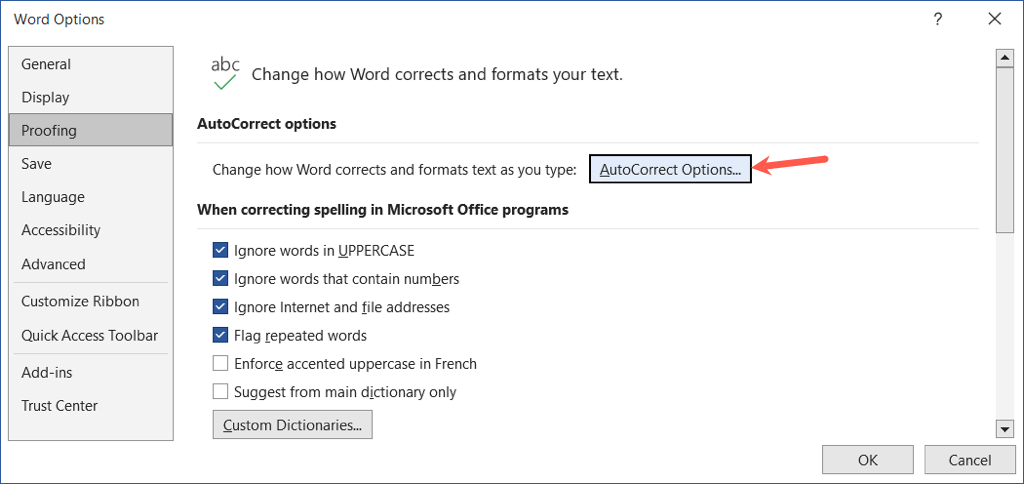
- In the pop-up window, go to the AutoFormat As You Type tab.
- Under Apply as you type, mark the checkbox for Automatic bulleted lists.

- Select OK in the AutoCorrect window and again in the Word Options window.
When you type an asterisk or dash moving forward, this automatically creates a bullet list format. If you want to undo the list format, select the arrow in the AutoCorrect Options button and choose Undo Automatic Bullets.
Add Sublevels to a Bullet List
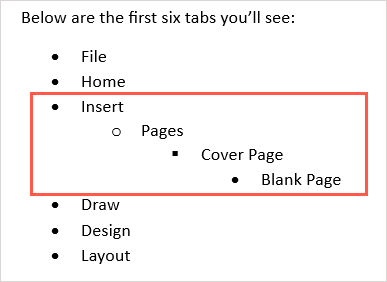
Whether you add bullets to existing text or start a new list, you can use different levels. This is similar to an outline where you have multiple levels that indent.
- Place your cursor at the start of the item you want to convert to a sub-item.
- Press your Tab key or select the Increase Indent button on the Home tab. On Windows, you can also use the Change List Level option in the Bullets drop-down menu.
- The list item will indent with a different bullet style, placing it beneath as a sublevel.
You can continue to indent further using the same process and see a new bullet style each time. This lets you create a multilevel list with little effort.
Customize the Bullet Style
You can create a custom bullet if you want to use something other than the default bullet styles. This is convenient if you want to use different symbols, characters, or images.
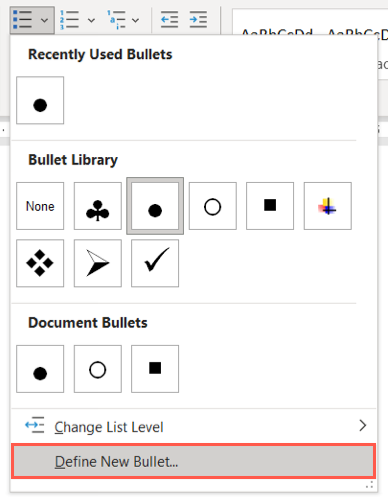
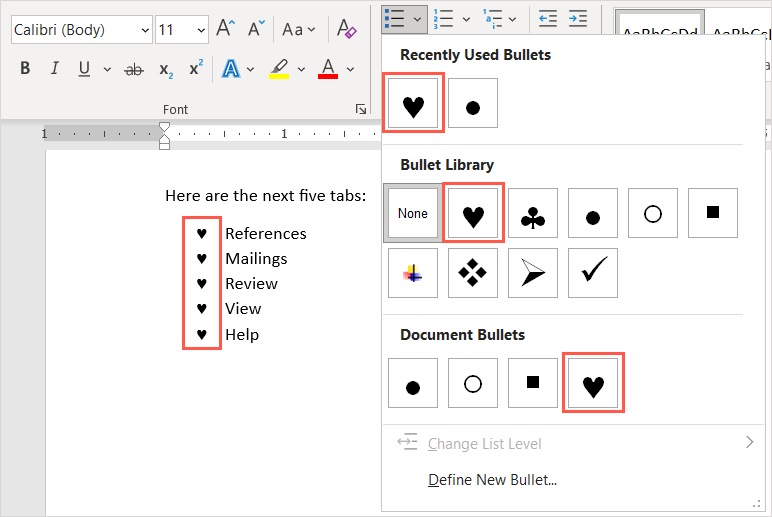
- Select the Bullets drop-down list in the Paragraph section on the Home tab.
- Pick Define New Bullet.
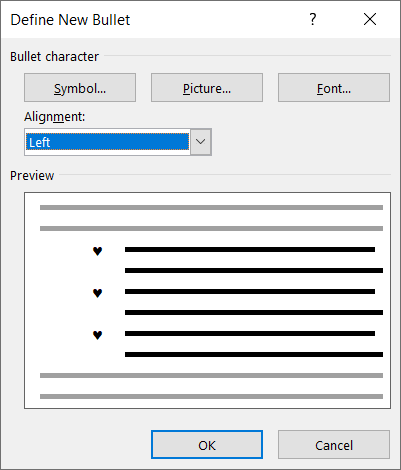
- You can then choose Symbol, Picture, or Font at the top of the pop-up window for the type of bullet you want to use. Below, you can see the Symbol dialog box as an example.
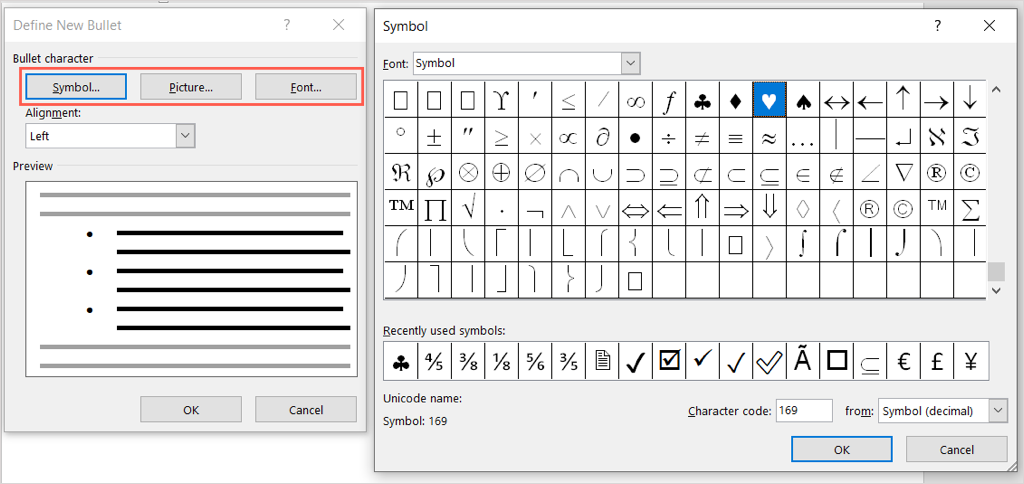
- Next, select left, centered, or right in the Alignment drop-down box for the bullet’s position to the list items.
- As you make your adjustments, you’ll see a Preview at the bottom of the window. Select OK when you finish.
You’ll then see your new bullet style in your document. You can also see it in the Bullets menu on the Home tab to use it in other spots.
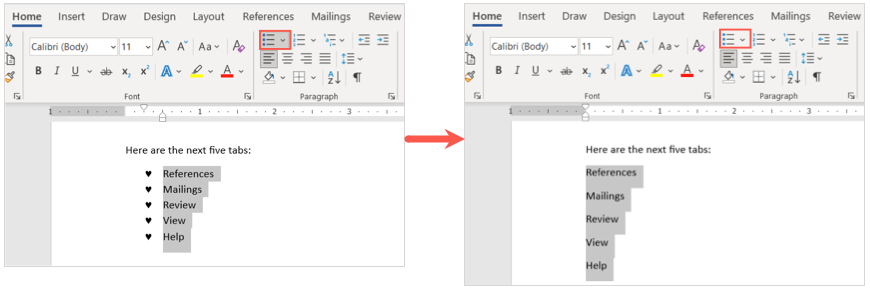
Remove Bullets From a List
If you decide to remove the bullet list later but want to keep your items, you can do this easily.
Select all of the text in the bullet list. Go to the Home tab and choose the Bullets button. This deselects the bullet list format and removes the bullets from your text.
When you insert bullet points in a Microsoft Word document, you’ll have a neat and professional way to display list items.
Now that you know how to add bullet points in Word, look at our other Microsoft Office tutorials, like how to make a checklist in a Microsoft Excel worksheet.
Subscribe on YouTube!
Did you enjoy this tip? If so, check out our YouTube channel from our sister site Online Tech Tips. We cover Windows, Mac, software and apps, and have a bunch of troubleshooting tips and how-to videos. Click the button below to subscribe!
Subscribe