It makes for some cool effects
Colors are an important aspect of any art, photo, or design piece. Sometimes, you might feel like a certain color just doesn’t belong, and you want to recolor it. You can do this easily in Photoshop, even without erasing and recoloring something manually.
There is a feature Photoshop has called Replace Color. It’s a quick way to switch colors out if you feel like something needs to be changed. It also should only take a minute or so for you to do once you get the hang of using it.
Table of Contents
Here’s how to use Photoshop’s Replace Color feature.
How To Use Replace Color
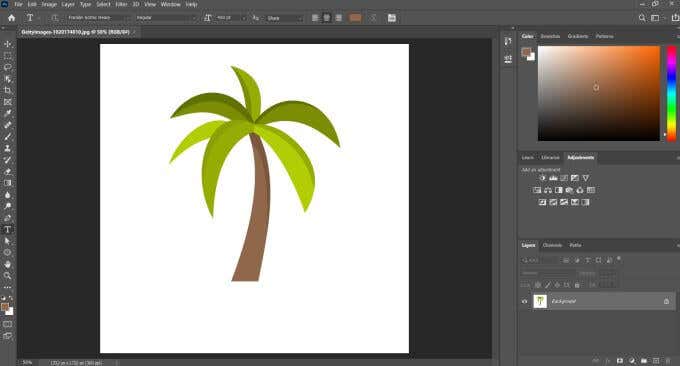
First, you’ll want to have the image open with the color you’d like to replace. In this example, I’ll be using this design of a palm tree that I’d like to make purple.
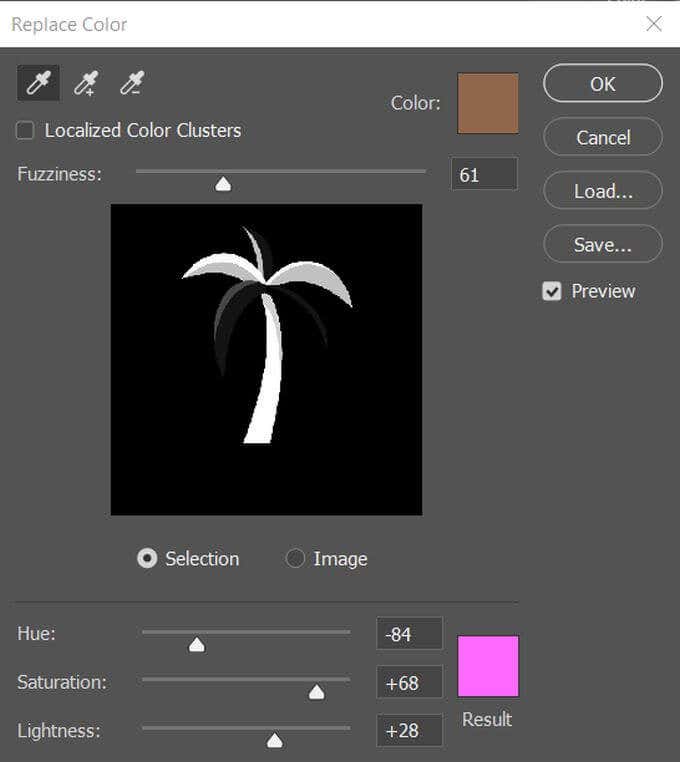
With the image open, go to Image > Adjustments > Replace Color. A window will come up where you can start to use this feature.
Click the part of your picture where the color is that you want to replace. The color chosen will show up in the box in the upper right labeled Color.

Now, click on the box in the bottom right labeled Result. You’ll be able to pick what color you want to change the original color to here.
You can also change the hue, saturation, and lightness of the color. When you’re happy with the color, click OK.
Now, I want to change the palm leaves to a more neon teal color. So, I’ll do the same method as before, but this time choose the leaves as my color.
With the Fuzziness level set the way it was, though, Photoshop didn’t pick up all the green in the leaves.

The Fuzziness will add or remove parts of the color selection depending on the level it’s set at. The higher it is, the more hues it will take in relative to your selected color.
So, I upped the value and all the leaves are now the color I wanted.
When You Should Use Photoshop’s Replace Color Feature
There are times when using Replace Color will be easier than others. It’s a great tool to use in some cases, but in others it could make your image look messy, and those are times when it may be better to replace a color manually.
For example, this feature works less well with real-life photos. In this image of a surfer, say you wanted to replace the color of his suit to look more green.
Well, there are a lot of dark navy/black hues in this photo already, so Replace Color is also going to change these hues as well, in places you don’t want.

Even reducing the Fuzziness level will still change some colors you might not want to change. The best time to use Replace Color is when you have very solid colors, such as in a graphic design or illustration piece.
You can still get some interesting effects using Replace Color in real-life photos, though, so if you want to achieve a more stylized edit, don’t cut out its potential entirely. The downside is just that you won’t have as much control over how the colors get applied to the photo, so the effect could be hit-or-miss.
Another option, if you want more control over the color replacement, is to use another feature called the color replacement tool.
Using the Color Replacement Tool
This is an entirely different tool than Replace Color, and you can find it under the brush tool if you right-click it.

With this tool, you can replace any color you want with the brush. The color you’ll replace original colors with will be your foreground color you see at the bottom of your toolbar. You can click this color to change it if you want.
You’ll also see a crosshair in the middle of your brush cursor. This is how Photoshop knows what color you want to replace. So, make sure you keep that crosshair only within the color you’re replacing. If you move it to a different color, Photoshop will register that color as the one to replace instead.
You don’t need to worry about your brush size, though, as it will only paint over the color that the crosshair registers. If you only want Photoshop to register a color once instead of continuously, you can choose the Sampling: Once icon in the options bar, which looks like an eyedropper with an x at the end.

Again, like the Fuzziness setting in Replace Color, you can change the Tolerance setting for Photoshop to allow color change to a wider range of hues based on the registered color.
If you need more precision for your color replacement, this is the better tool to use, as it gives you full control of what color gets changed.
Tips for Using Photoshop’s Replace Color Feature
There are some aspects of this tool that at first may be confusing. For example, it doesn’t really work with stark black or white hues. Photoshop doesn’t count these as actual ‘colors’, so you can’t replace a non-color.
There are ways that you can change black to another color, but they involve a lot of workarounds that don’t use Replace Color. So, when using this feature, be sure you’re replacing an actual color and not just black or white.
Also keep in mind that going from a dark color to a light color might make the image look a bit off, especially if you’re editing a real-life photo. It’ll likely make your picture appear washed out, because Photoshop is trying to accommodate the darker color to make it appear brighter.
Subscribe on YouTube!
Did you enjoy this tip? If so, check out our YouTube channel from our sister site Online Tech Tips. We cover Windows, Mac, software and apps, and have a bunch of troubleshooting tips and how-to videos. Click the button below to subscribe!
Subscribe